No products in the cart.

Your First Drone Flight: A Step-by-Step Guide for Indian Hobbyists
Introduction
Getting ready for your first drone flight in India? This comprehensive guide walks new drone pilots through everything needed to take off safely and legally.
This step-by-step tutorial is designed for Indian hobbyists who just bought their first drone and want to fly responsibly. Whether you picked up an affordable drone for beginners or invested in a more advanced model, you’ll learn the essentials before your maiden flight.
We’ll cover the critical DGCA drone regulations and registration process you must complete before flying. You’ll also discover how to choose safe flying locations that comply with Indian drone laws and master the basic controls that every new drone pilot needs to know. By the end, you’ll have the confidence and knowledge to execute your first flight successfully while following all drone safety tips and legal requirements.
Let’s get your drone hobby in India started the right way.
Understanding Legal Requirements and Registration in India

Navigate DGCA drone registration process efficiently
Getting your drone registered with the Directorate General of Civil Aviation (DGCA) isn’t as complicated as it might seem. The entire process happens online through the Digital Sky platform, India’s official drone management system. You’ll need to create an account at digitalsky.dgca.gov.in and provide basic details like your name, address, and contact information.
Start by uploading a clear photo of yourself, a government-issued ID proof, and address verification documents. The system accepts Aadhaar cards, passports, or driving licenses. Once your account is verified, you can proceed to register your specific drone model.
For each drone, you’ll enter technical specifications including weight, dimensions, maximum flight altitude, and manufacturer details. The platform maintains a database of approved drone models, making it easier to find your specific aircraft. If your drone isn’t listed, you’ll need to submit additional technical documentation from the manufacturer.
The registration fee varies based on your drone category, typically ranging from ₹100 to ₹1,000. Payment can be made online using standard banking methods. After successful registration, you’ll receive a Unique Identification Number (UIN) that must be displayed on your drone during flights.
Identify your drone category and compliance needs
Indian drone laws classify aircraft into five distinct categories based on weight, each with specific compliance requirements. Understanding your drone category determines what permissions you need and where you can fly.
Nano drones (up to 250 grams) offer the most freedom for beginner drone flying in India. These lightweight aircraft don’t require pilot licensing or flight permissions for recreational use, making them perfect affordable drones for beginners India. Popular models in this category include the DJI Mini series and several Indian-manufactured options.
Micro drones (251 grams to 2 kg) represent the sweet spot for hobbyists. While registration is mandatory, you don’t need a Remote Pilot License for recreational flying. Most entry-level drones India fall into this category, offering good camera quality and flight performance without excessive regulatory burden.
Small drones (2-25 kg) require both registration and a Remote Pilot License, even for hobby use. These professional-grade aircraft need comprehensive insurance coverage and adherence to stricter operational guidelines.
Medium (25-150 kg) and large drones (above 150 kg) are primarily commercial aircraft with extensive certification requirements that most hobbyists won’t encounter.
Check your drone’s actual takeoff weight including batteries, propeller guards, and any accessories you plan to use. Many manufacturers list empty weight, but DGCA drone regulations consider the complete operational weight for categorization.
Obtain necessary permissions for recreational flying
Recreational drone flights in India require different permissions based on your aircraft category and intended flight area. The Digital Sky platform streamlines this process through its automated permission system.
For nano and micro drones flying below 50 feet in green zones, permissions are automatically granted through the platform. Simply log into your account, select your registered drone, specify flight details including date, time, and location, then submit your request.
The system typically processes routine permissions within minutes for standard recreational flights. However, starting drone hobby in India means planning ahead for weekend flying sessions, as the platform can experience high traffic during peak times.
Flights above 50 feet or in yellow zones require additional scrutiny. These requests may take 24-48 hours for approval and often include specific conditions like maximum altitude limits or flight duration restrictions.
Always carry proof of permissions on your mobile device during flights. Traffic enforcement and security agencies are increasingly aware of drone regulations and may request documentation during routine checks.
Permission validity periods vary from single flights to monthly approvals for regular flying locations. Frequent flyers can apply for recurring permissions to avoid repeated applications for the same location and flight parameters.
Understand no-fly zones and restricted airspace
India’s airspace classification directly impacts where you can safely and legally operate drones. The Digital Sky platform uses a color-coded system to identify different zones with varying restriction levels.
Red zones are completely prohibited for civilian drone operations. These include areas around international airports (10 km radius), military installations, strategic locations, and international borders. Mumbai, Delhi, and Bangalore airports maintain some of the largest red zones in the country.
Yellow zones allow controlled drone operations with proper permissions. Most urban areas, domestic airports, and sensitive installations fall under this category. Flying here requires specific approvals and often includes altitude restrictions below 200 feet.
Green zones offer the most freedom for recreational flying, typically covering rural areas and regions away from airports and sensitive installations. Even in green zones, you must maintain maximum altitudes and avoid flying over crowds or private property without permission.
Download offline maps from the Digital Sky platform before heading to new flying locations. Internet connectivity can be poor in remote areas, and you need real-time access to airspace information for safe drone flying.
Pay special attention to temporary restrictions during VIP movements, public events, or security alerts. These dynamic no-fly zones can appear with short notice and affect previously approved flight areas. The platform sends notifications about temporary restrictions to registered users, but always verify current status before flying.
Remember that no-fly zones extend vertically through all altitudes. Even if you’re flying a nano drone at low altitude, red zone restrictions still apply. Local law enforcement has authority to intervene in violations, regardless of drone size or intended use.
Essential Pre-Flight Equipment and Safety Gear
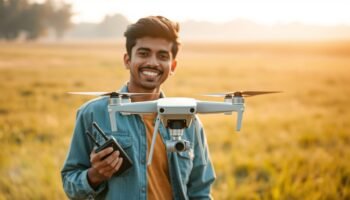
Choose the right beginner-friendly drone model
Getting your hands on the perfect starter drone can make or break your journey into aerial photography and recreational flying. The Indian drone market offers several excellent options that balance affordability with essential features for new pilots.
DJI Mini series tops the list for best beginner drones India enthusiasts. The DJI Mini 2 or Mini 3 weighs under 249 grams, keeping you below the weight threshold that triggers stricter regulations under DGCA drone regulations. These drones offer exceptional camera quality, reliable GPS positioning, and intuitive controls that help prevent crashes during your learning phase.
Ryze Tello deserves serious consideration for absolute beginners. This lightweight drone costs significantly less than premium models while offering programmable features and decent flight stability. Its built-in safety features include automatic takeoff and landing, making your first drone flight in India much smoother.
For those seeking affordable drones for beginners India, the Holy Stone HS165 provides excellent value. It includes GPS return-to-home functionality, altitude hold, and a decent camera for capturing your early aerial adventures. The price point makes it less stressful if you encounter the inevitable learning curve bumps.
Entry-level drones India buyers should prioritize these key features:
GPS positioning for stable hovering
Automatic return-to-home function
Obstacle avoidance sensors
Decent flight time (minimum 15-20 minutes)
Spare battery availability
Local service support
Avoid toy-grade drones from unknown brands. These cheap alternatives often lack proper stabilization and safety features, leading to crashes that discourage new pilots. Stick with established manufacturers who provide firmware updates and customer support.
Assemble your complete safety and maintenance kit
Safe drone operation requires more than just the aircraft itself. Building a comprehensive safety and maintenance kit protects your investment and ensures consistent flight performance.
Essential safety equipment includes:
| Item | Purpose | Estimated Cost (INR) |
|---|---|---|
| Propeller Guards | Protect props and nearby objects | 500-800 |
| Landing Pad | Clean takeoff/landing surface | 300-600 |
| Extra Batteries | Extended flight sessions | 2000-4000 each |
| Battery Charging Hub | Charge multiple batteries simultaneously | 1500-2500 |
| Carrying Case | Transport protection | 1000-3000 |
Maintenance supplies keep your drone in peak condition:
Cleaning cloths for camera lens and body
Compressed air canister for removing debris
Small screwdriver set for minor adjustments
Spare propellers (always carry at least two sets)
Memory cards with fast write speeds for smooth video recording
First aid kit shouldn’t be overlooked. Drone propellers can cause cuts, and crashes might create sharp debris. Include basic bandages, antiseptic wipes, and pain relievers in your field kit.
Weather monitoring tools help you make smart flying decisions. A simple anemometer measures wind speed, while weather apps provide real-time conditions. Safe drone flying means never pushing weather limits, especially during your learning phase.
Create a pre-flight checklist covering battery levels, propeller tightness, camera settings, and GPS signal strength. This systematic approach prevents most common issues that lead to crashes or flyaways.
Install required mobile apps and software
Modern drone flying relies heavily on smartphone integration and specialized software. Setting up these digital tools correctly directly impacts your flight safety and overall experience.
DJI Fly or DJI GO 4 (depending on your drone model) serves as your primary flight control interface. Download the official app from Google Play or Apple App Store – never use unofficial versions that might lack security updates or proper functionality.
Airmap or NOMAN (No Objection to Military and Aviation from Nearest) apps help you identify restricted airspaces around your location. These tools integrate Indian drone laws and DGCA drone regulations into user-friendly maps showing no-fly zones, airports, and military installations.
Weather applications like Windy or UAV Forecast provide detailed wind conditions, precipitation forecasts, and visibility reports. These apps include specific aviation weather data that generic weather apps often miss.
FlySafe database updates keep your drone’s internal no-fly zone maps current. Enable automatic updates to ensure compliance with changing airspace restrictions.
Configure your smartphone properly:
Enable airplane mode with WiFi only during flights
Disable automatic app updates during flight sessions
Clear storage space for video recording
Adjust screen brightness for outdoor visibility
Install offline maps for areas with poor cellular coverage
Firmware updates for your drone require regular attention. Set up automatic notifications but perform updates in controlled environments, never just before planned flights. Outdated firmware can cause unexpected behavior or compatibility issues with mobile apps.
Flight logging apps like Airdata help track your flight history, analyze performance patterns, and identify potential maintenance needs. These records prove valuable for insurance claims and help you understand your piloting progress over time.
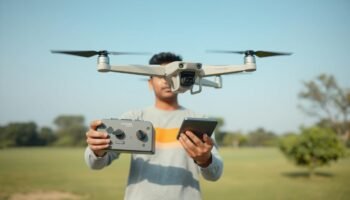
Master Basic Drone Controls and Functions

Learn fundamental flight controls and movements
Getting comfortable with your drone’s basic controls is like learning to drive – you need muscle memory before you can focus on the fun stuff. Your controller typically has two joysticks, and understanding what each one does will make your first drone flight in India much smoother.
The left joystick controls throttle and yaw. Push it up to make your drone climb higher, pull it down to descend or land. Move it left or right to rotate your drone clockwise or counterclockwise. This rotation movement is called yaw, and it’s super helpful when you want to change the direction your camera is facing without actually moving the drone.
The right joystick handles pitch and roll – these control your drone’s forward, backward, and sideways movements. Push forward to fly away from you, pull back to bring the drone closer. Move left or right to make your drone drift sideways. These movements might feel backwards at first, especially when your drone is facing you, but stick with it.
Start practicing these movements one at a time. Don’t try to combine multiple controls until each individual movement feels natural. Most beginner drone flying mistakes happen when pilots get overwhelmed trying to do too much at once.
Practice takeoff and landing techniques safely
Takeoff and landing are the most critical phases of any flight. Before attempting your first takeoff, double-check that your drone is on level ground and the propellers are clear of any obstacles. Many crashes happen because pilots rush this basic step.
For takeoff, gently push the left joystick upward. Don’t jam it – smooth, gradual movements work best. Bring your drone up to about 10 feet and let it hover there. This gives you a safe buffer from the ground while you get comfortable with the controls.
Landing requires even more patience. Bring your drone down slowly, especially the last few feet. Many drones have downward sensors that help with landing, but these can get confused over certain surfaces like water or highly reflective materials. Always be ready to take manual control.
Practice the emergency stop procedure. Most drones let you quickly land by holding down both joysticks in specific directions. Learn this combination before you need it – panic moments aren’t the time to figure out emergency procedures.
Create a landing checklist: check battery levels, ensure you’re over a safe landing spot, verify no people or animals are nearby, and descend slowly while maintaining control. These habits will serve you well as you advance to more complex flights.
Understand GPS and manual flight modes
Modern drones typically offer several flight modes, and understanding these is crucial for safe drone operation. GPS mode (sometimes called Position mode) is your best friend when starting out. In this mode, your drone uses GPS satellites to maintain its position, automatically hovering in place when you release the controls.
GPS mode also enables features like Return to Home (RTH), which automatically flies your drone back to its takeoff point if the battery gets low or you lose connection. This safety feature has saved countless drones from becoming expensive tree decorations.
Manual mode (or ATTI mode) disables GPS assistance, making your drone more responsive but also more challenging to control. Wind will push your drone around, and it won’t automatically hover when you let go of the controls. Save manual mode for when you’ve mastered GPS flying – it’s not beginner-friendly.
Some drones offer sport modes that increase speed and agility while maintaining GPS stability. These modes are tempting but can quickly get beginners into trouble. The drone responds much faster to control inputs, making precise movements harder.
Always check which mode you’re in before takeoff. Most drones display the current flight mode on the controller screen or app. Starting a flight in the wrong mode has led to many avoidable accidents.
Configure camera and gimbal settings properly
Your drone’s camera and gimbal system need proper setup to capture great footage while maintaining flight stability. Start with basic settings before diving into advanced photography features.
Set your camera resolution and frame rate based on your intended use. For casual flying and sharing on social media, 1080p at 30fps works perfectly and doesn’t fill up your storage as quickly as 4K. If you’re planning to edit your footage later, 4K gives you more flexibility but requires more powerful editing equipment.
Gimbal calibration is essential for smooth footage. Most drones auto-calibrate their gimbals during startup, but you should know how to manually calibrate when needed. An uncalibrated gimbal will produce shaky, unusable footage and might even affect your drone’s flight stability.
Learn to adjust gimbal tilt during flight. The gimbal tilt control (usually a wheel or button on your controller) lets you look up or down while flying. Practice smooth gimbal movements – jerky camera movements scream “amateur” in drone footage.
Set up your camera exposure settings correctly. Auto exposure works fine for beginners, but understanding basic exposure controls will improve your results dramatically. Bright sunny days in India can create harsh shadows and blown-out highlights if you’re not careful with your settings.
Most drones offer different color profiles. Standard profiles work well for immediate sharing, while flat profiles give you more flexibility in post-processing but require editing knowledge. Start with standard profiles until you’re comfortable with basic drone operation.
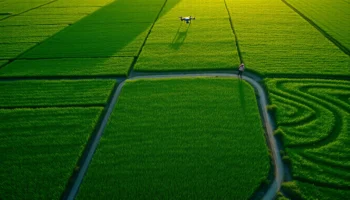
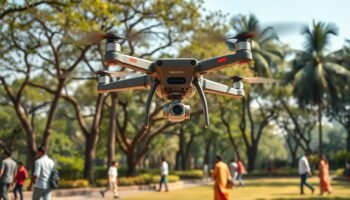
Select Your Perfect First Flight Location

Identify Safe and Legal Flying Spots Near You
Finding the right location for your first drone flight in India can make or break your beginner drone flying experience. You’ll want to start by checking the DigitalSky platform, India’s official drone operation portal, which shows No-Fly Zones across the country. These restricted areas include airports, military installations, government buildings, and international borders – places where drone operations could pose security risks.
Look for open fields, large parks, or rural areas away from crowded spaces. Agricultural lands often provide excellent practice opportunities, but always get permission from landowners first. Many experienced pilots recommend starting in areas at least 5 kilometers away from airports and 3 kilometers from military bases to stay well within DGCA drone regulations.
Urban drone pilots face more challenges, but options still exist. Large college campuses, sports complexes, and designated recreational areas can work well. Some cities have started creating specific zones for drone enthusiasts, so check with local authorities about designated flying areas.
Consider joining local drone clubs or online communities focused on drone flying tips in India. Fellow hobbyists often share their favorite practice spots and can guide you toward locations that offer both safety and legality. Many experienced pilots are happy to mentor newcomers and share their knowledge about safe drone operation.
Assess Weather Conditions for Optimal Flying
Weather plays a crucial role in safe drone flying, especially for beginners learning drone safety tips. Wind speed should be your primary concern – most entry-level drones India manufacturers recommend flying only in winds under 10-15 mph. Strong winds can easily overwhelm a beginner pilot and lead to crashes or flyaways.
Check weather apps that provide real-time wind data at different altitudes. Surface winds might seem calm, but conditions can be dramatically different even 50 feet up. Rain or high humidity can damage electronic components, so postpone flights during monsoon conditions or when rain threatens.
Temperature extremes affect battery performance significantly. Very cold weather reduces flight time, while excessive heat can cause overheating. Early morning or late afternoon flights often provide the most stable conditions, with calmer winds and better lighting for visual tracking.
Visibility matters too. Fog, haze, or bright sun can make it difficult to maintain visual contact with your drone. As a beginner, you need clear sight lines to your aircraft at all times. Avoid flying during golden hour until you’re more experienced, as the sun can create glare issues and make orientation challenging.
Ensure Adequate Space for Emergency Procedures
Emergency planning separates responsible pilots from reckless ones. Your chosen location should provide ample room for unexpected situations like sudden wind gusts, control signal loss, or mechanical failures. A general rule suggests having at least 100 meters of clear space in all directions from your takeoff point.
Consider potential landing zones if your drone experiences problems. Hard surfaces like concrete or asphalt can damage your aircraft during emergency landings, while soft grass or dirt fields provide better cushioning. Avoid areas with water bodies, dense vegetation, or valuable property nearby where a crashed drone could cause damage or be difficult to recover.
Practice emergency procedures in your chosen location before they become necessary. Know how to activate Return-to-Home functions and understand how your specific drone model behaves during signal loss. Some drones automatically return to their launch point, while others hover in place or land immediately.
Keep emergency contact information handy, including local authorities and drone manufacturer support. If your drone does crash or get stuck, you’ll want quick access to help. Many insurance policies for drones require proper documentation of incidents, so having emergency procedures in place protects both your equipment and your wallet.
Plan escape routes for yourself too. If curious onlookers gather or authorities approach, you should know how to quickly and safely land your drone and pack up your equipment. Being prepared for these situations shows professionalism and helps maintain positive relationships with the community around your flying area.
Execute Your First Flight Successfully

Complete comprehensive pre-flight safety checklist
Your pre-flight checklist is your safety lifeline. Start by checking weather conditions through reliable apps like Windy or AccuWeather. Wind speeds should stay below 15 mph for beginners, and visibility needs to be clear with no approaching storms. Rain and fog create dangerous flying conditions that even experienced pilots avoid.
Inspect your drone physically before every flight. Look for loose propellers, damaged rotors, or cracks in the body. Check that your battery is properly seated and shows full charge. A partially charged battery cuts your flight time short and increases crash risks. Clean your camera lens and gimbal, ensuring smooth movement without obstructions.
Test all control functions while the drone sits on the ground. Verify that each stick movement corresponds correctly to your drone’s response. Check GPS signal strength – you need at least 8-10 satellites for stable flight. Your smartphone should show strong connectivity to the drone’s app, with all firmware updates completed beforehand.
Review airspace restrictions using the official DGCA app or platforms like AirMap. Even experienced pilots double-check no-fly zones, especially around airports, military installations, and populated areas. Your chosen location should have DGCA approval for recreational flying.
Perform basic flight maneuvers with confidence
Start with simple hovering exercises. Take off slowly and hold your drone steady at eye level, about 10 feet away. Practice maintaining position for 30-second intervals. This builds muscle memory for stick control and helps you understand how your specific drone responds to input.
Master the fundamental movements one at a time. Begin with forward and backward motion using gentle stick movements. Avoid sudden jerky controls that can destabilize your aircraft. Side-to-side movements come next, followed by gentle turns using the yaw function. Each maneuver should feel deliberate and controlled.
Practice the “box pattern” – a simple rectangular flight path that combines all basic movements. Fly forward, turn right, move sideways, turn right again, and return to your starting point. This exercise builds confidence and spatial awareness that’s crucial for safe drone operation in India.
Emergency procedures deserve special attention. Practice immediate stop commands and learn to quickly switch to manual control if GPS fails. Know how to activate return-to-home functions instantly. These skills become automatic with repetition and could save your drone in unexpected situations.
Monitor battery life and return-to-home features
Battery management separates successful flights from expensive crashes. Most beginner drones provide 15-25 minutes of flight time, but plan for 20% less in real conditions. Wind, cold weather, and aggressive flying drain batteries faster than specifications suggest.
Set multiple battery alerts on your controller app. Configure warnings at 50%, 30%, and 20% battery levels. When the 30% alert sounds, start heading back toward your takeoff point. The 20% warning means immediate landing – no exceptions for “just one more shot.”
Return-to-home (RTH) features work as your safety net, but they’re not foolproof. Test RTH functionality during every flying session while maintaining visual contact. Some drones struggle with RTH accuracy in areas with poor GPS reception or strong electromagnetic interference.
Understand RTH limitations in Indian flying conditions. Dense urban environments can confuse GPS signals, causing RTH errors. Tall buildings, power lines, or heavy tree cover might block your drone’s return path. Always maintain manual override capability and clear sight lines to your landing zone.
Capture stunning aerial footage responsibly
Start with basic camera settings on automatic mode while you develop piloting skills. Most modern drones produce excellent footage without manual adjustments. Focus on smooth, deliberate movements rather than complex camera settings during your first flights.
Plan your shots before takeoff. Identify interesting subjects, lighting conditions, and potential obstacles. Simple shots like slow forward movements over landscapes or gentle orbital shots around stationary objects create impressive footage without requiring advanced piloting skills.
Respect privacy laws when filming in India. Avoid capturing people’s private property, faces, or activities without permission. Popular tourist spots often have specific drone regulations, so research local rules beforehand. Some states have additional restrictions beyond federal DGCA guidelines.
Smooth footage requires steady hands and patient movements. Rapid direction changes create jerky, unwatchable video. Practice maintaining consistent speed and direction. Use your drone’s obstacle avoidance features, but don’t rely on them completely – they can malfunction or miss thin objects like power lines.
Land safely and secure your equipment
Choose your landing spot carefully before beginning descent. Flat, clear ground away from people and obstacles provides the safest option. Avoid landing on sand, gravel, or wet surfaces that could damage motors or sensors. Your landing area should be visible throughout the entire descent.
Execute landing procedures slowly and deliberately. Descend gradually while maintaining position over your chosen spot. Watch for ground effect – the cushion of air that can make your drone bounce slightly just before touchdown. Keep controls steady until motors shut down completely.
Post-flight maintenance extends your drone’s lifespan significantly. Remove the battery immediately after landing to prevent over-discharge. Clean propellers and body of any debris collected during flight. Check for damage that might have occurred during your session.
Store everything properly for future flights. Batteries should be stored at partial charge (around 50%) in cool, dry locations. Keep memory cards organized and backed up. Your investment in proper storage and maintenance pays dividends in reliable performance and longer equipment life.
Conclusion

Flying your first drone is an exciting milestone that opens up a world of creative possibilities and aerial adventures. By following India’s registration requirements, gathering the right safety gear, and practicing basic controls, you’re setting yourself up for years of safe and enjoyable flights. Remember to start small with simple maneuvers in open spaces before attempting more complex shots or locations.
Your drone journey starts with that first takeoff, but it doesn’t end there. Keep practicing regularly, stay updated on changing regulations, and always prioritize safety over getting the perfect shot. The skills you build today will make you a confident and responsible pilot tomorrow.
👉 Looking for the right gear to start? Check out our Beginner Drone Collection — featuring affordable, easy-to-fly, and DGCA-compliant drones perfect for Indian hobbyists. Whether you want stable flight, sharp aerial shots, or budget-friendly options, we’ve got the best drones to get you flying today.
Most importantly, have fun exploring the skies – there’s nothing quite like seeing the world from above through your drone’s camera.

Related posts
Introduction The wide-open skies over India’s villages are a perfect canvas for stunning aerial views of green fields, winding rivers, and peaceful landscapes. However, before...
Introduction: First Time Flying? Let’s Decode Your Drone’s Controls Together Got a new drone? That’s awesome! Your first flight is an exciting moment. We know...
Introduction: Mastering Your Drone Remote with Flexnova Flying a drone is exciting, but for beginners, the drone remote guide for beginners can feel confusing. Between...
Don’t Fly Without It: Your Essential Pre-Flight Checklist for Budget Drones Drones are no longer just luxury gadgets. In India, budget-friendly drones are helping beginners...
Introduction : Flying Your Drone Safely in Crowded Areas-DGCA Rules & Expert Tips for India (2025) India is one of the fastest-growing drone markets in...
Add comment
You must be logged in to post a comment.