No products in the cart.

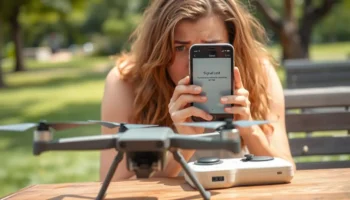
Crashed Your Drone? A Simple Guide to DIY Repairs
Introduction
It happens to every pilot. A sudden gust of wind, a misjudged distance, and your drone takes an unexpected landing. Before you panic and think about expensive repair bills, take a deep breath. Many common crash damages are easy to fix yourself! This guide will walk you through the most common DIY drone repairs, from simple repair drone propellers to assessing minor simple drone body repairs. With a little patience and the right know-how, you can often get your drone back in the sky quickly and affordably. Let’s get your bird flying again. Flexnova is here to help you fix it.
First Steps: Your Post-Crash Checklist

Right after a crash, don’t just pick it up and try to fly again. Follow this simple drone crash checklist first.
- Power Down: Turn off the drone’s motors immediately (if they’re still running) and disconnect the battery. This prevents further electrical damage or injury from spinning propellers.
- Visual Inspection: Carefully look over your drone. Check for obvious cracks, broken parts, and loose wires. Listen for anything rattling inside when you gently shake it.
- Propeller Check: Inspect each propeller for chips, cracks, or bends. Even a small bend can cause vibrations that lead to bigger problems.
- Motor Test: Without the propellers attached, power on the drone and gently increase the throttle for each motor individually in your app. Listen for any grinding sounds or feel for motors that don’t spin smoothly.
Fixing the Most Common Problem: Propeller Repair

Broken or damaged propellers are the number one issue after a crash. Learning how to fix drone propellers is your first repair skill. The truth is, you don’t fix them—you replace them. It’s cheap, easy, and essential for safe flight.
Step-by-Step Propeller Replacement Guide
- Identify the Type: Drones have two types of propellers: Clockwise (CW) and Counter-Clockwise (CCW). They are usually marked with raised letters or color-coded (e.g., black for CW, white for CCW). Match the new one exactly to the old one.
- Remove the Old Propeller: Use the included tool or a small screwdriver to hold the motor steady. With your other hand, unscrew the propeller. It might be tight! Turn it counter-clockwise to loosen it.
- Attach the New Propeller: Place the new propeller on the motor shaft. Hand-tighten the screw clockwise until it’s snug. Do not over-tighten it, as you could strip the plastic threads.
- Check All Four: Even if only one is broken, it’s a good idea to replace propellers in pairs (e.g., both front props) to keep everything balanced.
This propeller replacement guide is the most important skill for handling fixing broken propellers.
Dealing with a Cracked Frame or Body
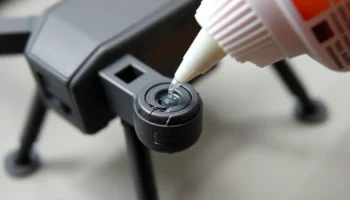
A crack in the plastic body or arm is more serious, but sometimes you can manage a temporary fix. This drone body repair guide comes with a big warning: gluing is often a temporary solution and can make a professional repair harder later.
How to Fix a Cracked Drone Frame (Temporarily)
For small, non-structural cracks, you can try a careful fix.
- Clean the Area: Use a cotton swab with a little rubbing alcohol to clean any dirt or grass from the crack.
- Apply a Strong Adhesive: Use a tiny, precise amount of a strong, fast-drying plastic glue or a two-part epoxy. Apply it only to the crack itself, avoiding any nearby electronics, motors, or screws.
- Clamp and Dry: Gently press the crack together and hold it, or use a small clamp or rubber band to keep it secure while it dries completely. Follow the glue’s instructions for drying time.
- Test Carefully: After the glue is fully cured, do a very careful test flight in a wide-open space. Watch for any vibrations or unusual behavior.
Remember, this is a temporary fix for minor damage. For any crack near a motor or a major break in an arm, it is much safer to seek professional help or replace the entire body shell.
When to Stop: DIY vs. Professional Repair
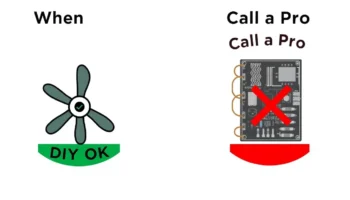
Knowing when to stop is a crucial part of drone repair for beginners. Some problems are not meant for DIY. Send your drone to a professional if you see any of the following:
- Motor is Damaged: It makes grinding noises, doesn’t spin freely, or gets extremely hot.
- Internal Electronics Exposed: You can see damaged circuit boards or loose wires hanging out.
- Gimbal or Camera Damage: The camera won’t stabilize, points in the wrong direction, or has a cracked lens.
- Drone Won’t Power On: If you’ve checked the battery and it’s fine, but the drone shows no signs of life, the problem is internal.
For other issues like connection problems, our guide on troubleshooting drone connections might help before you call a pro.
FAQs on DIY Drone Repairs
Can I straighten a bent propeller instead of replacing it?
You can gently try to bend a slightly bent propeller back into shape, but be warned: this weakens the plastic. It will never be perfectly balanced again, which can cause vibrations that strain your motors and lead to more damage. For the price of a new set of propellers, it’s always safer and better to just replace them.
What basic tools do I need for drone repairs?
A small precision screwdriver set is the most important tool. It should include Phillips and flathead bits that are the right size for the tiny screws on your drone. A pair of tweezers can also be helpful for handling small screws and parts.
Where can I buy replacement parts for my drone in India?
The best place to start is the official website of your drone’s manufacturer or their authorized dealers. You can also find generic parts like propellers and some body shells on e-commerce websites like Amazon India. Always double-check that the part is compatible with your specific drone model.
Is it worth it to repair a very cheap drone?
It depends on the cost of the parts and the damage. If a ₹5000 drone needs a ₹2000 repair, it might not be worth it. However, if you just need a new set of propellers for ₹500, then repairing it is definitely worth it. It’s a great way to learn common drone repairs without risking an expensive model.

Related posts
Introduction Is your drone camera blurry? You’ve just flown to a perfect spot for that epic shot, only to see soft, out-of-focus footage on your...
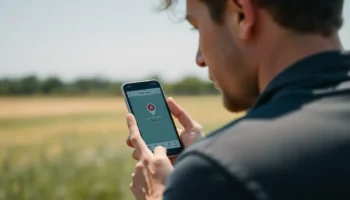
Introduction Nothing ruins a flying session faster than a lost connection. The screen freezes, the controls become unresponsive, and your heart drops. This sudden break...
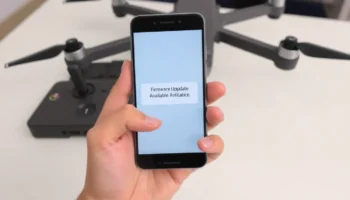
Introduction Think of your drone as a smartphone. Just like your phone gets software updates to fix bugs and add new features, your drone needs...
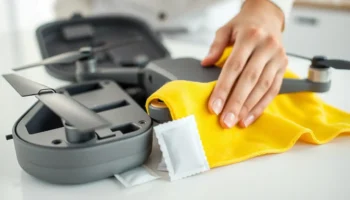
Introduction India’s climate is beautiful but tough on technology. High humidity, salty coastal air, and sudden monsoon showers can silently damage your drone’s sensitive electronics....
Introduction So, your drone took an unexpected dive. A sudden gust of wind, a software glitch, or a simple mistake—it happens to every pilot at...
Add comment
You must be logged in to post a comment.